

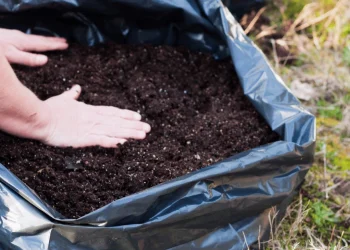
I got into the habit of gardening to live more sustainably. And reusing my garden or potting soil is also a part of it.
However, repeatedly using the same garden or potting mix is also a good way to spread harmful microorganisms across your whole garden. Well, at least without sterilization.
Now, I know what you’re thinking. “Sterilizing soil? That sounds like something out of a science fiction movie!” But trust me, it’s not as complicated as it sounds.
Soil sterilization is the process of killing harmful microorganisms, pests, and weed seeds that can cause damage to your plants. There are several methods of soil sterilization, including solarization, steam sterilization, and chemical sterilization. Or you can even sterilize your garden soil in the oven or in the microwave. Each method has its pros and cons, but the end result is the same – a healthy soil environment that promotes plant growth.
Trust me, your plants will thank you for it.
Why is it Important to Sterilize Soil Before Re-Using
But why should you bother sterilizing your garden soil? The answer is simple – healthy soil equals healthy plants.
By sterilizing your soil, you are creating a clean environment that is free from all harmful pests, weeds, and disease-causing pathogens, giving your plants the best chance to thrive.
Unfortunately, it’s not all sunshine, and there are some cons too. Especially you can’t choose which microorganisms to kill. Soil sterilization will also kill all the beneficial organisms there.
Pros
- Eliminate soil-borne diseases, pests, and weed seeds
- Inexpensive compared to buying a new bag of soil
- Easy to do at home
- Many methods are non-toxic
- Reduces the need for pesticides and other chemical treatments
Cons
- Can also kill all the beneficial microorganisms in the soil
- May temporarily disrupt soil ecology
- Can be a time-consuming and labor-intensive process
When to Sterilize your Soil
Timing is key when it comes to soil sterilization. Generally, it can be done at any time during the year, depending on the method chosen.
Firstly, it’s important to consider what you plan to grow in your garden. If you are planting seeds or transplants, it’s best to sterilize your soil before that to create a clean, disease-free environment. Unlike a mature flower or plant, which can handle a few bugs on its own, a seed is unlikely to develop in such an environment.
Also, if you notice that a disease or pest is widely spreading across your garden, it’s a good idea to sterilize your soil as a preventative measure to get rid of it right from the start. It’s better to lose a part of your garden now than a whole garden later.
6 Methods of Soil Sterilization
There are several methods of soil sterilization that can be divided into two groups; heat sterilization and chemical sterilization.
Each of these methods, I will show you in just a second, has its unique advantages and disadvantages, which mainly come down to three points:
- The price
- Time-intensity
- And for what quantity of soil it’s suitable
How to Sterilize Soil with Solarization
Soil polarization is a non-toxic and completely free method of sterilizing soil using the sun’s natural heat. It works by trapping the sun’s energy beneath a clear layer of plastic and heating the soil to a temperature that is lethal to many soil-borne pests and diseases.
This method is suitable for large amounts of soil and hot summer days. But the biggest downside is that the sun isn’t shining all day long. So the soil doesn’t stay at the required temperature for long enough to fully sterilize it. For that reason, you should leave the soil to bask in the sun for at least four to six weeks. Here’s a step-by-step guide.
- Prepare the area: Clear the soil of weeds, debris, and any large rocks. If you are working with potting soil from a container, also break any big clumps. Then level the soil surface as much as possible to ensure good contact with the plastic. However, it’s important not to compact the soil too tightly. We still need oxygen to flow through.
- Water the soil: Add plenty of water to the soil. A moist environment will allow the heat to penetrate the soil more deeply. Also, moist soil conducts heat better than dry soil. This should speed up our process.
- Cover the soil with plastics: Now, cover the soil with a clear plastic sheet, ensuring that it is sealed tightly around the edges to trap heat. You can also use rocks or a bit more soil to weigh down the plastic and prevent it from blowing away. However, try to cover the top as little as possible.
The type of plastic you choose is also important. A clear or transparent plastic sheet works best. When it comes to thickness, I would recommend choosing something not too thick but also not too thin. A thinner sheet may not be durable enough to withstand the heat and pressure created during the process and may tear or break down quickly. A thicker plastic sheet, on the other hand, may not allow enough sunlight to penetrate through the soil. So it’s best to choose something between 1.5 and 2.5 mils. - Wait: Let the sun do its work for at least 4 to 6 weeks during the hottest months of the year. There is no clear way to determine if the process is finished and the soil is sterilized, so don’t rush it.
Sterilizing Soil in an Oven
Using an oven to sterilize soil is another great method that could be included in the first group; heat sterilization.
It’s a quick and effective method of killing off soil-borne pests and diseases in smaller batches; for instance, if you need to sterilize two pots of soil in under an hour. There is no major downside hidden in this method besides a quite unpleasant odor that might fill your kitchen.
- Spread the soil evenly on an oven-save container: Put about four inches (10 cm) of soil into a glass or metal baking pan. Before that, you should rid the soil of all rocks or large clumps.
- Moist the soil using a spray bottle: Using a spray bottle, mix in enough water to get a moist but not runny mixture. But don’t toss the soil around. This would create big and compact mud clumps, and we don’t want that. The water will create steam that will sterilize the soil.
- Cover the top with aluminum foil and poke a few small holes in the foil lid.
- Place the soil in the oven: Preheat your oven to 180-200°F (80-95°C). If your oven has an oven fan, it’s better to use a setting with that turned off. Once your tray is in the oven, we’ll bake it for approximately one hour.
- Check the temperature: Use a thermometer to ensure that the temperature of the soil reaches at least 180°F (82°C) and stays at this temperature for at least 30 minutes. If you do not own a kitchen thermometer, leaving the soil in the oven for at least 75 minutes should do the trick.
- Allow the soil to cool down: Once the soil has been sterilized, remove it from the oven and let it cool down completely before using it for planting.
Sterilizing Soil with Steam or Boiling Water
I decided to group these two methods of soil sterilization together because they both utilize hot water as the medium of sterilization.
In the latter method, you simply pour boiling water over the soil. However, it may not be as effective as other methods mentioned. While boiling water will definitely kill some pathogens, it does not penetrate deep enough to kill all harmful microorganisms.
But you can easily upgrade this method by slightly modifying it and sterilizing soil with steam. If you have ever heated chocolate over steam, you’ll be familiar with this process.
- Prepare the soil: Even when sterilizing soil using steam, you should filter the soil of any rocks, remnants of roots and break up big clumps.
- Put water to a boil: For this to work, you’d need two pots. One larger that we’ll fill with water and one just a bit smaller to be placed on top of the first one. Fill the larger one with a few cups of water. You’ll be trapping the steam from escaping with the smaller pot, so it’s sufficient to just cover the bottom.
- Steam the soil: Once the water is boiling, place a desired amount of soil into the smaller pot and place it on top of the boiling pot.
- Place a lid on the pot and wait: You’re not making soup. We want to heat the pot at its content to a temperature that will kill all unwanted organisms. So place the lid on and let it steam for at least 30 minutes.
- Let the soil cool down: After the timer runs out, take the pot off the stove and allow it to cool down. At this point, the soil is fully sterilized, so you can speed up this process by moving it to a new, cold pot.
How to Sterilize Soil using a Microwave
Another “no-special tools needed” method is sterilizing a garden or potting soil using a Microwave. This method is suitable only for very small amounts of soil.
If you need to quickly sterilize just one pot of soil, you’ll be done in about a minute and a half.
- Fill a Ziploc bag or Spread the soil on a dish: For this method, you can either use a heat-friendly Ziploc bag filled with a couple of pounds of moist soil or a microwave-safe dish with a thin layer of moist soil. I tried both methods, and the Ziploc bag works a bit better as the soil is more evenly heated. For the Ziploc method, it’s important not to close the bag all the way. Keep the back open to about halfway for ventilation.
- Microwave the soil: Place the soil in the microwave and heat on high for two to three minutes. The exact time will depend on the wattage of your microwave and the amount of soil being sterilized. But the soil should, as always, reach at least 180°F (82°C) internal. Ideally, stir the soil and repeat the process multiple times.
- Allow the soil to cool down: Once the soil has been sterilized, remove it from the microwave and let it cool down to room temperature before using it for planting.

How to Sterilize Soil with Hydrogen Peroxide
With this sterilization method, we are moving to the second category of chemical sterilization.
Hydrogen peroxide is one of these household staples was all have tucked away in our bathroom cabinets, used for cleaning or for disinfection. Its composition is actually water with an extra molecule of oxygen; therefore, its formula is H2O2.
Apart from sterilizing, Hydrogen peroxide can treat root rot and help aerate the soil.
- Create a hydrogen peroxide solution: One of the most commonly sold hydrogen peroxides is a 3% concentrate. For that reason, the measures you can see below are also for a 3% hydrogen peroxide.
- 1½ teaspoons of hydrogen peroxide in 1 cup of water
- 2 tablespoons of hydrogen peroxide in 1 quart of water
- ½ cup of hydrogen peroxide in 1 gallon of water
- 2½ cups of hydrogen peroxide in 5 gallons of water
- 7.5 ml of hydrogen peroxide in 250 ml of water
- 30 ml of hydrogen peroxide in one liter of water
- 250 ml of hydrogen peroxide in 3.75 liters of water
- Transfer the mixture into a spray bottle and spray the soil as well as the container. It’s ideal to do that in the evening, once the sun is down. We don’t want this to evaporate quickly.
Tip: When hydrogen peroxide is exposed to light, it can start to decompose back into water and oxygen. Afterall, it’s a water with one extra oxygen molecule added. So make sure to mix the solution and use it right away. It will break down even faster when mixed with water, that act as catalyst and speed up the decomposition.
Other Chemical Sterilization Solutions
Alongside hydrogen peroxide, formalin is widely used as a disinfectant. However, formalin is a toxic and hazardous chemical, and it’s better to avoid it, at least for the purpose of soil sterilization.
Formalin is a formaldehyde and water solution that is mainly used by professionals in medical and laboratory settings as well as in agriculture. For that reason, I would rather not tell you the exact step-by-step process of using formalin to sterilize a soil.
Replace Beneficial Organisms after Sterilization

After soil sterilization, there is one more important thing to do.
As unfortunate as it is, sterilization not only kills all the harmful pathogens and pests but also beneficial bacteria, fungi, and other microorganisms that help your plants to grow.
To replace those beneficial organisms, you should add compost, manure, or other organic matter to the soil. But on the other hand, avoid adding fertilizers to the soil at this point. Fertilizers could burn your plants, which are still getting used to their new home.
What else can you do to Prevent Pests in your Garden
Soil is not the only thing that needs to be sterilized. If you have diseases in your garden, you can easily spread them around with all kinds of garden tools. It’s not necessary to sanitize your tools after every use if your garden is perfectly healthy. But it should be done regularly, especially after working with infected plants or soil.
To clean your garden tools, you can use a solution of bleach and water or rubbing alcohol.
Also, this one is not repeated enough. Do not put infected plants or soil in your compost. If you compost your plants, you can reintroduce the same problems you are trying to avoid.
Conclusion
We’ve explored a variety of methods to get our garden soil squeaky clean and ready for planting. Whether you choose to solarize, oven bake, steam, microwave, or use hydrogen peroxide, you can rest easy knowing that you’re creating a healthy environment for your plants.
I know it may sound like a lot of work. And to that, I say, it doesn’t have to be! The preparation phase takes around 20 minutes at max. And then simply leave it to do its thing for a while. And as a bonus, you save money on buying new potting or garden mixes. Which, by the way, are definitely not interchangeable. And you can see why in my in-depth article examining whether or not you can use garden soil in pots.


