
When I saw rutabagas at the farmer’s market a few months ago, I had to try them. At first, I was a bit surprised by the taste. So, I decided to alter the cooking technique, and after roasting them, I fell in love.
Since rutabaga is not very common in stores here, I had to try to grow my own as a proper gardener. As I found out, it’s a very easy, straightforward process, and once the cutting is planted in the soil, it doesn’t require much, apart from occasional watering.
Growing from scraps gives you a head start, taking away the need to deal with seeds. It’s also a great way to save a bit of money and reduce your food waste.
In this article, I will show you the entire process of growing rutabaga from scraps. Five minutes of time is all you need: four to read this article and one to start the process; it’s that simple. Let’s dive in!
What to Know Before you Start Growing Rutabaga from Cuttings
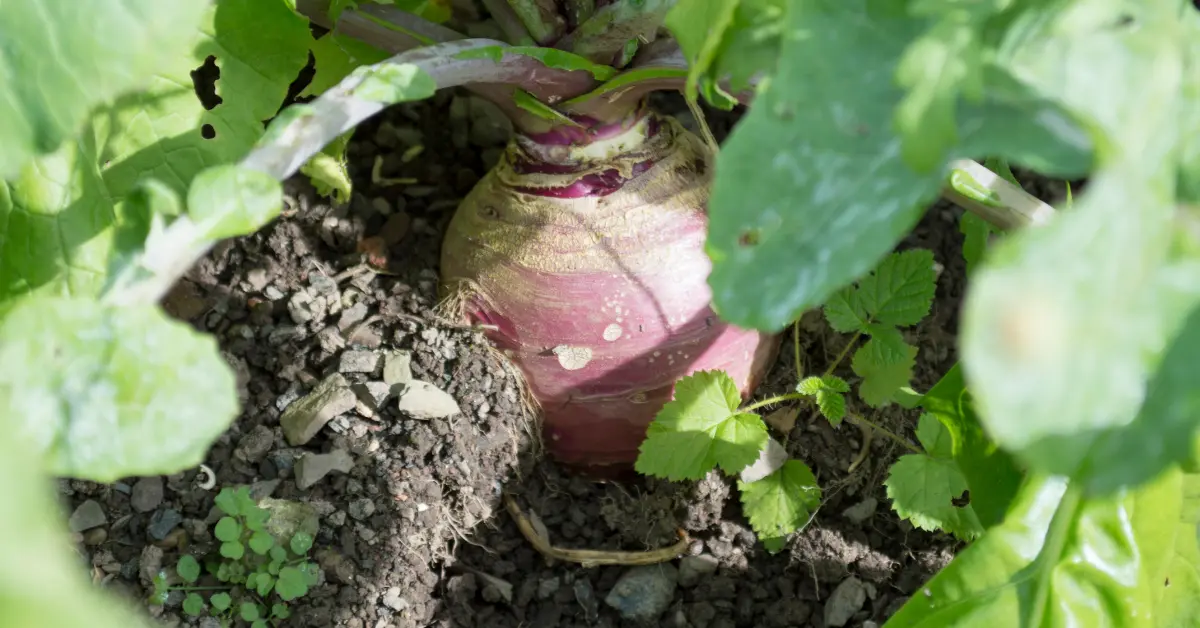
When I talk about growing root vegetables, like rutabaga, from cuttings, it’s not from any part of the vegetable. You can’t grow rutabaga from leaves, for example. The only part that works for this purpose is the upper part of the root, typically where the greens are attached.
This process won’t grow a whole new rutabaga root; instead, you can expect a few inches of regrowth from the upper cutting. But what you can do is let the rutabaga produce flowers with seeds.
When you leave rutabaga planted through the winder, it will start to flower and develop seeds. These seeds can be harvested and planted to establish a completely new batch of rutabaga in your garden.
How to Grow Rutabaga from Scraps
Before we dive into the hard work (it’s actually very easy), let’s gather the essentials.
First, you’ll need rutabaga scraps or cuttings. But as already mentioned, not every part will suffocate. You need a few inches from the top of the rutabaga, ideally with the leaves still intact. The leaves will help the plant to produce energy through photosynthesis.
Rutabaga doesn’t need to be rooted in water beforehand. But I highly recommend it, as it will higher our chances and headstart our process. And after that, straight to the soil. Rutabagas are pretty resilient and will do well in any soil mix. But the ideal would be a well-draining, nutrient-rich soil that is slightly acidic.
And, of course, watering is a crucial part of any plant care. And that’s it. Now let’s take a look at how to do it step-by-step.
1. Prepare the Rutabaga Scraps
The first step in growing rutabaga from scraps is to properly prepare the rutabaga scraps themselves.
It’s better if you are starting with whole, fresh rutabaga root. Once cut, rutabaga will start oxidizing fast, which lowers are chance for successful root regrowth minute by minute. If you have scraps from yesterday or the day before, don’t worry, we can still work with it.
In the first case, look for rutabagas that look firm and healthy. Next, take a sharp knife and make a clean, straight cut about 2 inches (5 centimeters) from the greens.
The average rutabaga grows to about 12 to 24 inches (30 to 60 centimeters) tall, which is a lot bigger compared to similar vegetables, such as turnips. So even after cutting off 2 inches, you’ll still have more than enough for eating.
2. Soak the Rutabaga Cutting in Water
This step is optional, but I highly recommend it. It will speed up the process and also give you the option to toss away cuttings that did not root.
Take a jar of water and submerge the rutabaga. Make sure to submerge only the lower part of the cutting. That’s the part that needs moisture and hydration to initiate root development.
Leave the cutting soaked until thin roots start to appear. Then you can plant it in the soil.
3. Prepare Soil and a Pot
Rutabaga grows really big, so it’s important to select a proportionally large pot.
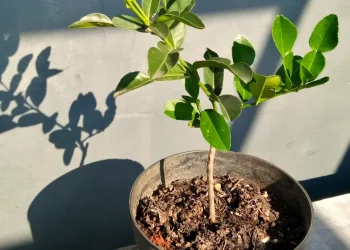
You can’t expect when growing from scraps, the rutabaga to reach its original size. But about half to two-thirds of the original size is realistic.
With that said, I would recommend choosing a pot that is at least 12 inches (30 centimeters) deep, even better if you have a raised bed in your garden.
Then fill the pot with your selected soil. I wouldn’t be afraid to use any leftover soil you have at home, as long as it is more to the acidic site and it’s well-draining. Soil within a pH range of 6.0 to 6.8 is ideal.
4. Plant the Rutabaga Cuttings
Now it’s time to plant those beautiful scraps into our prepared soil.
Use your finger or a garden tool to create a little hole in the soil. The hole should be big enough to accommodate the whole rutabaga cutting, only the leaves should be left above ground.
Then gently press the soil around the cutting to secure it in place.
Don’t forget that rutabaga does not only grow vertically but also horizontally. If you are planting multiple cuttings, give them enough space around for possible growth.
5. Water the Soil and Place to a Sunny Location
Don’t forget to water the soil and place the pot in a sunny location. At least 6-8 hours of sunlight a day is ideal.
Keep the soil consistently moist by watering it regularly, but be cautious not to overwater, as rutabagas are susceptible to root rot.
6. Harvest Grown Rutabaga and Enjoy!

Finally, after approximately 90-100 days, your rutabaga should be fully regrown. It’s hard to know when it’s the right time to take them out. But you can tell from the foliage. Once it turns dark green in color, it should be ready.
To harvest your rutabagas, gently loosen the soil around the base of the plant and lift it out of the soil.
Before you go…
As you can see, it’s actually very easy to grow rutabaga from scraps. But it would quickly get boring if that’s the only vegetable you eat, right? Luckily, growing turnips from scraps is a very similar process, but it’s a lot quicker. In the meantime, while you’re waiting for your rutabaga to grow, you can be eating fresh turnips. Make sure to check my other article to see the steps…


